TL;DR: Any SIEM migration is guaranteed to be a complex project. It involves moving the security data your SOC depends on, rebuilding or translating detections for the new SIEM, and making sure you haven’t lost detection coverage along the way. Realm makes SIEM migration easier and safer by separating your security data from the SIEM that receives it, allowing you to route data to both platforms during the migration. It also identifies the sources and fields your detections depend on, so you can compare coverage before and after the move.
SIEM migration looks simple on paper. Choose a new SIEM, connect your data sources, move your detections, check everything works, and turn off the old one.
Anyone who has been involved in a SIEM migration project knows it rarely goes that smoothly. In fact, a SIEM migration can be one of the most disruptive projects a SOC takes on.
The disruption created by SIEM migration has less to do with setting up a new SIEM and more with moving everything connected to the old one. Your data, detection rules, stored logs, and analyst workflows may all depend on how the existing SIEM works, which means that replacing it can result in your team having to rebuild or adapt much of the security operation around it.
And the worst case is a detection that has been rebuilt in the new SIEM but never fires because the data it needs is arriving in a different format (or doesn’t arrive at all).
But there is another, easier way to do it, and it involves a security data pipeline.
By putting a security data pipeline between your sources and destinations, you can separate your security data architecture from the SIEM that receives it. When you change SIEMs, you can route the data to the new platform rather than reconnecting every security tool individually. And if the pipeline knows which sources and fields your detections depend on, you can check the new SIEM is receiving them before you rely on it.
That’s the approach Realm takes to SIEM migration.
What Is SIEM Migration?
SIEM migration is exactly what it sounds like. It involves moving your organization from one SIEM platform to another.
If just the thought of that as a project makes you break out in a sweat, that’s totally understandable. Over time, a SIEM can become connected to much of the SOC, so changing a SIEM also means figuring out what has to move with it and what you can leave behind.
Why Organizations Migrate SIEMs
For a mix of technical, operational, and commercial reasons.
A common one is cost, i.e., the existing SIEM has become too expensive as the organization’s data volume grows.
But it could also be that the current SIEM requires too much maintenance and tuning, no longer meets the SOC’s requirements, or that new capabilities are difficult to add. Some organizations may also be looking to modernize their SOC by consolidating tools, moving from on-premises to the cloud, or reducing their reliance on proprietary data formats.
Regardless of the reason(s), the goal is pretty much always the same. Get the capabilities you need from the new SIEM without losing the data, detections, and workflows that your SOC depends on.
How Security Data Pipelines Help with SIEM Migration
In a traditional SIEM architecture, data collection and routing are usually closely tied to the SIEM that receives the data. But when you change SIEMs, you also have to consider everything built around that flow of data, including how it is collected, parsed, routed, and retained.
A security data pipeline like Realm separates the data layer from the SIEM. Instead of each firewall, endpoint, identity platform, and cloud service sending data to a particular SIEM, those sources send it through the pipeline. The pipeline controls what goes where and in what form.
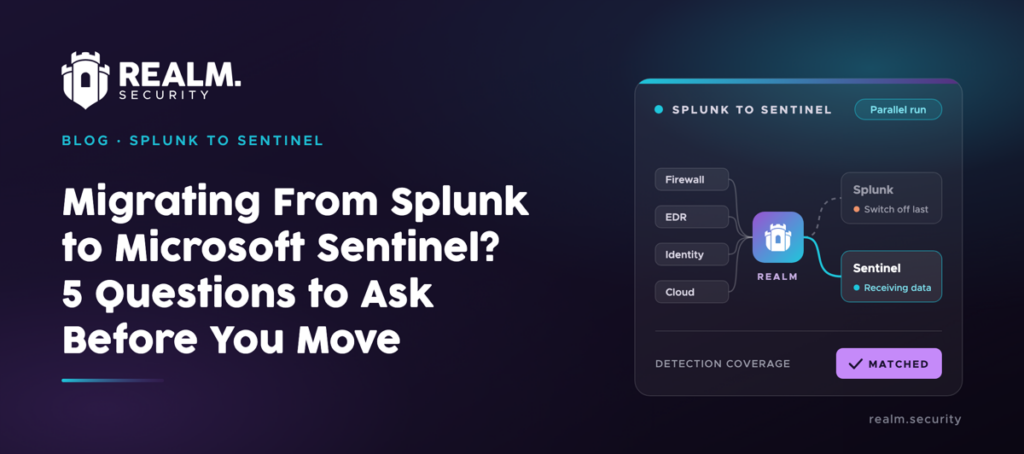
During a migration, you can add the new SIEM as another destination while the existing one keeps running. When you switch off the old SIEM, you change where the data is sent, but how it is collected stays the same.
A security data pipeline makes some parts of moving to a new SIEM easier.
Still, there are other migration tasks you need to handle yourself. For example, you may still need to recreate or adapt detections, dashboards, integrations, and analyst workflows to the new platform.
What Is Realm?
Realm is the SOC-aware security data pipeline. It sits between your security data sources and destinations, giving you one place to control how security data is routed, reduced, transformed, and retained before it reaches your SIEM.
What makes Realm particularly useful during a SIEM migration is that it combines the data pipeline with an understanding of the detections that rely on that data.
Realm’s Detection Integrity reads your existing detection rules and maps them to the log sources and fields they depend on. It uses that map to protect detection-critical data when reducing log volume and to give you a baseline for checking detection coverage after the move.
Realm can also send the same security data to your old SIEM and your new SIEM in parallel, with data normalized and mapped to the format each destination expects. Data that doesn’t need to be sent to the SIEM can still be retained in Data Haven, Realm’s searchable retention layer, for future searches and investigations.
Because Realm handles much of the data work around a SIEM migration, your team can focus exclusively on the parts that remain SIEM-specific, like rebuilding detections, dashboards, integrations, and analyst workflows.
SIEM Migration in 7 Steps
Here’s what a typical SIEM migration project looks like at a high level, and how a security data pipeline like Realm can make each stage easier.
Note: This guide assumes you have already set your migration goals and timeline.
- Understand your existing environment
- Decide what data needs to reach the new SIEM
- Connect your data to the new SIEM and run both in parallel
- Make sure your data works with the new SIEM
- Rebuild your detections and validate coverage
- Retain your history
- Switch off the old SIEM
Step 1Understand your existing environment
Start by working out what depends on the SIEM you are migrating away from. That includes the log sources sending data to it and the integrations your analysts use during an investigation.
It also includes people. Teams outside the SOC sometimes use the SIEM in ways nobody has written down. If you discover those requirements after the migration has started, they can cause delays, additional work, or reveal requirements the new SIEM wasn’t selected to support.
Then account for the detections, dashboards, alerts, and playbooks, many of which you’ll probably want to recreate on the new platform. Of these, detections require particular attention. They will have to be rewritten in the new SIEM’s query language (see step five below).
However, before that, you need to know which log sources and fields each detection relies on, so you can make sure the data it needs still reaches the new SIEM. Mapping your existing detections to MITRE ATT&CK can also give you a baseline of your detection coverage that you can compare against the new environment after the move.
Step 2Decide what data needs to reach the new SIEM
Not everything going into your existing SIEM necessarily needs to go into the new one. A SIEM migration is a good opportunity to find the data that provides little detection value and stop paying to ingest it.
For each source, ask whether any detection or investigation actually uses it. A source that has sat in the SIEM for years without ever being used in a rule can be left out of the new one.
Step 3Connect your data to the new SIEM and run both in parallel
Next, you need to get the required security data into the new SIEM.
If your security tools currently send their data directly to the old SIEM, you might have to change the configuration of those tools (firewalls, EDR, identity systems, cloud platforms, and so on) so that they send data to the new SIEM as well.
You generally won’t want to switch the old SIEM off immediately. Keeping both platforms running during the transition lets the existing environment continue operating while you build and test the new one. The downside is that you may be routing the same data to two places and paying to ingest twice.
Step 4Make sure your data works with the new SIEM
Connecting a source doesn’t automatically mean its data will work in your new SIEM.
Different SIEMs may structure the same security data differently, using different field names, schemas, and parsing requirements. Those differences can break detections that expect particular fields.
Step 5Rebuild your detections and validate coverage
Detection content may not migrate cleanly from one SIEM to another. Rules, correlation logic, queries, and playbooks may need to be translated or rebuilt for the new platform, using the old ones as a reference and asking of each whether you still need it.
Once migrated, you need to establish that the required data is arriving and that detections and alerts still work as expected. A detection existing in the new SIEM doesn’t necessarily mean it still has the data it needs to fire.
You should also recreate and test the dashboards, reports, and SOC metrics your team relies on so that analysts and other stakeholders still have the visibility they had in the old SIEM.
Step 6Retain your history
What happens to your historical data? Depending on your current retention setup, years of security data may be stored in your old SIEM. You need to decide whether to leave it there, move it to the new SIEM, or export it elsewhere for long-term storage and search.
Since historical logs may be required for investigations, threat hunting, compliance, and audits, make sure that the historical data you might need remains accessible before you decommission your old SIEM.
Step 7Switch off the old SIEM
Once you’ve confirmed that the new SIEM is receiving the required data, your detections and alerts are working, and your analysts can carry out the workflows they depend on, you can start decommissioning the old SIEM.
Simplify Your SIEM Migration Project with Realm
Here’s what a SIEM migration looks like with Realm in place:
- You connect your security tools to Realm. Realm keeps sending their data to your existing SIEM, so your current setup continues working.
- Realm analyzes your detections to establish what data they need and where you currently have detection coverage.
- You can approve Realm’s recommendations for reducing unnecessary data, potentially reducing SIEM ingestion costs.
- You add the new SIEM to Realm and send data to both the old and new SIEM while you move and test your detections.
- Once you’ve confirmed the new SIEM has the data and detection coverage it needs, you stop sending data to the old SIEM.
- Realm has been retaining your data in Data Haven since you connected your sources to it, so everything collected from that point no longer depends on the old SIEM. When you shut it down, there is nothing to export. Anything older than that remains in the old SIEM unless you move it.
Realm deploys in 7 to 10 days with no professional services and no code to write.
Getting Started
If you’re planning a SIEM migration, you can introduce Realm before you start moving data to the new platform.
Connect your security data sources to Realm and continue routing their data through Realm to your existing SIEM, so your current SIEM continues receiving the data it needs.
When you’re ready to introduce the new SIEM, add it as another destination in Realm and send data to both platforms while you migrate and validate your detections.
Once you’re confident in the new environment, stop sending data to the old SIEM without having to reconfigure your individual security tools.
Book a working session with Realm to walk through your SIEM migration plan.